
These cards were made using CTMH products and a masking technique.

Using post it notes, mask off the area that you do not want to stamp on.

Using Close to My Heart stamp set D1624 "Pathfinding Card workshop" (feather), ink up and stamp with VersaMark ink Z891, and stamp on card front. Turn feather as you stamp and overlap onto post it notes for more interest.

Add white embossing powder Z2068, clean off area you do not want powder on with a small dry paint brush.

Using heat gun Z555, heat powder until you see the feathers turn somewhat glossy.

For this card I used Topiary ink Z2155. I applied it using a dauber Z726. Ink up the dauber and begin inking in a circular motion. Begin on the post it note and work your way onto the card. Always begin off of the card or on the embossed image, other wise you will get a harsh amount of color on the card. Moving in a circular motion allows for a nice even spread of color. Begin with light pressure and increase as you become more comfortable. Many layers can be applied to darken.
I used Topiary on the edges and around the feathers. Any ink that goes onto the embossed image can be wiped off with a dry cloth/tissue after. It will not stick to the embossed image unless you use a permanent ink.


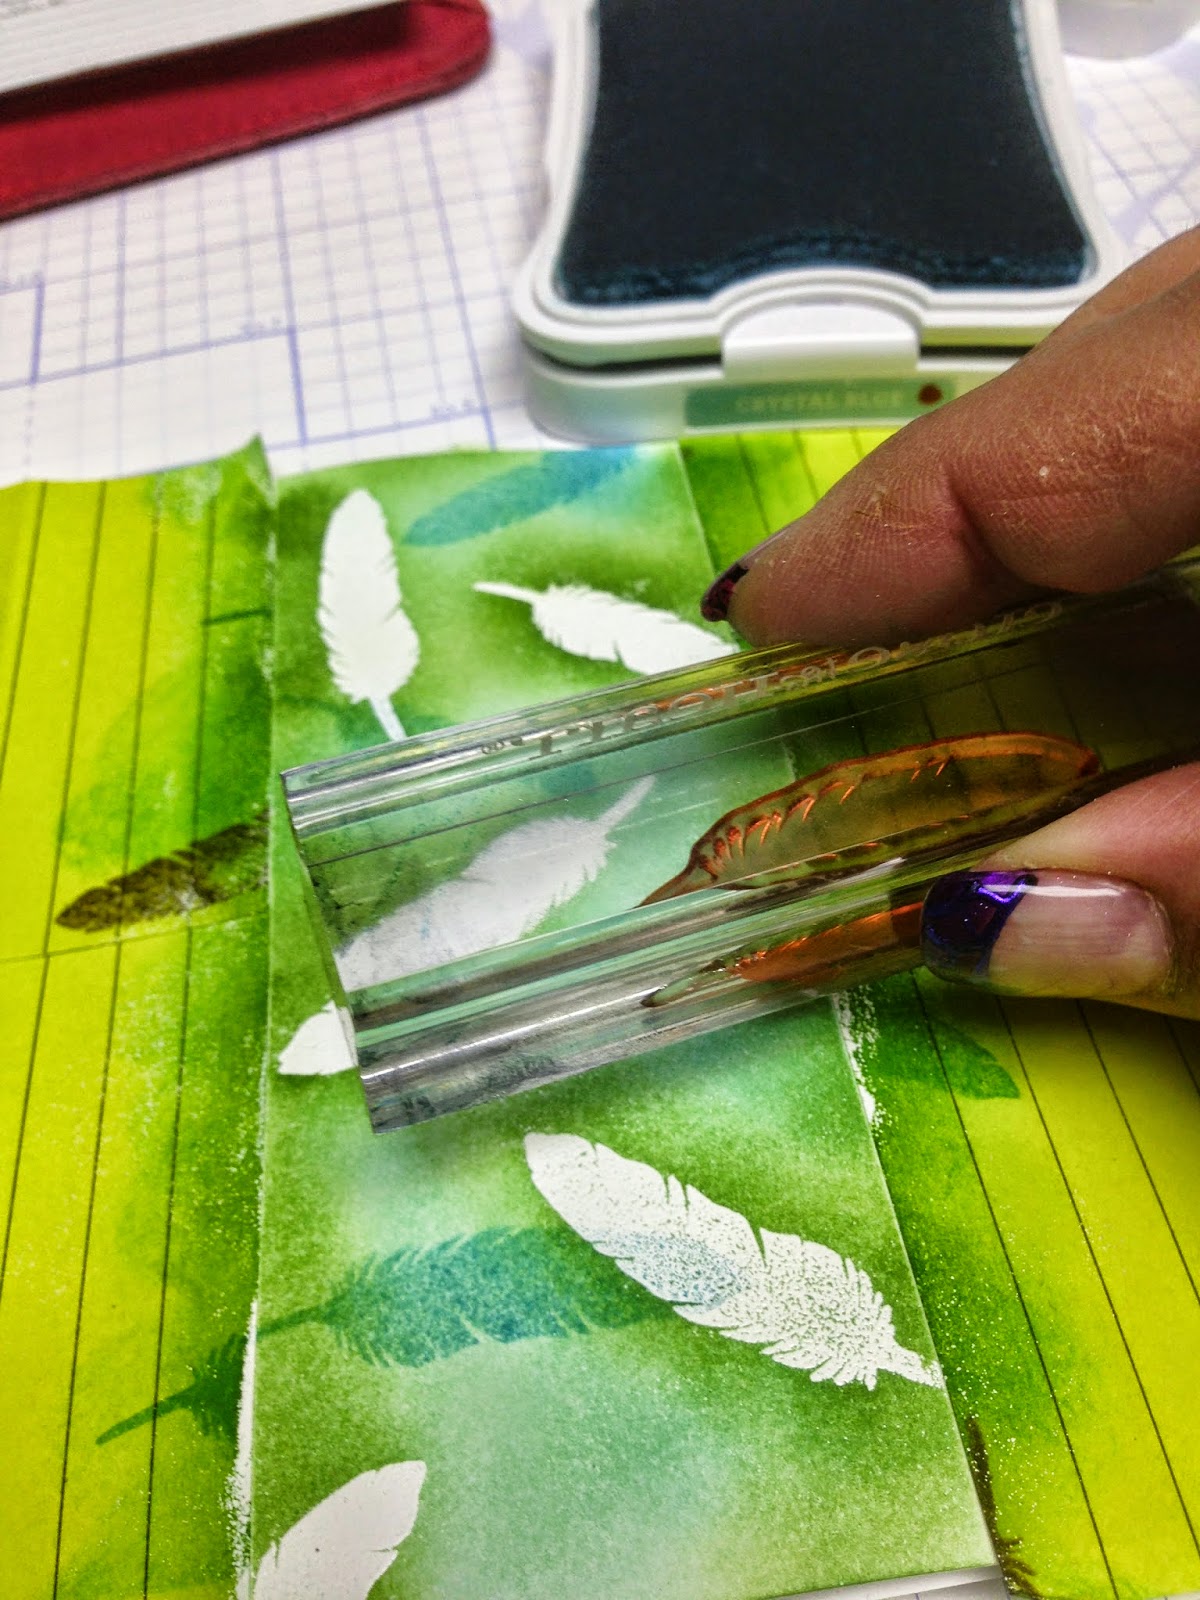
When I felt I had a sufficient amount of Topiary applied, I added Z2155 Crystal Blue using another dauber. Follow the same method as above, beginning on the post it notes and working onto the card in a circular motion. Fill in all spots. You can also add more Topiary if you like once the Crystal Blue is in place.
Ink up the feather stamp set with Crystal Blue and stamp randomly, turning the stamp as you go to create interest. I overlapped previous feathers. Once again, you can wipe off the ink from the embossed image easily with a dry cloth.

Repeat using Topiary. You can see in the above picture the ink over the white embossed image, below I wipe it off easily with a dry cloth.


Next I stamp the same feather with Z2111 Chocolate.

Carefully remove the post it notes, exposing the masked area of feathers, stamping and embossing.

Card with post it notes removed.

Once again I stamped with Chocolate. The first darker feather is stamped partially on the previously masked area and on the white card space. I stamped it a second time without re-inking it and turned it slightly. This technique is called "second generation stamping".

Now to add the sentiment. Using B1442 "Belated Birthday" and Chocolate ink, I stamped the "wishing you...Birthday" Then using Topiary I selected the "a happy" and stamped it in between.

I felt I wanted a little more definition around the colored area, so I used my black marker Z1979 and my CTMH ruler Z1471 and drew some lines around the edges. The ruler has several increments of measure that allows me to space my lines easily and evenly. A great tool!

Here is a close up of the completed card. I hope you enjoyed this tutorial. Please contact me for additional information at sandyzim@sasktel.net and if you would like to order any of these products, please do so at sandyzim.ctmh.com
How is it that I'm just now finding your blog??? Stunning work, and I really appreciate the "how to" photos. I'll be back on a regular basis!!
ReplyDeleteGlad to hear it Becca. I've just recently started this blog. I'm very new to it, lots to learn. Would appreciate any advice you might have in regards to blogging.
ReplyDeleteSandy
I like this feather. Need to get this WOTG :) thanks for sharing the tutorial!
ReplyDelete