This is a very unique 3D card I made for my mother and for my CTMH Club.

This is the card before it is opened up. Closed, the hearts cover the hidden smaller hearts.

As you open the card, each heart is held in place by the fold of the heart in front of it.
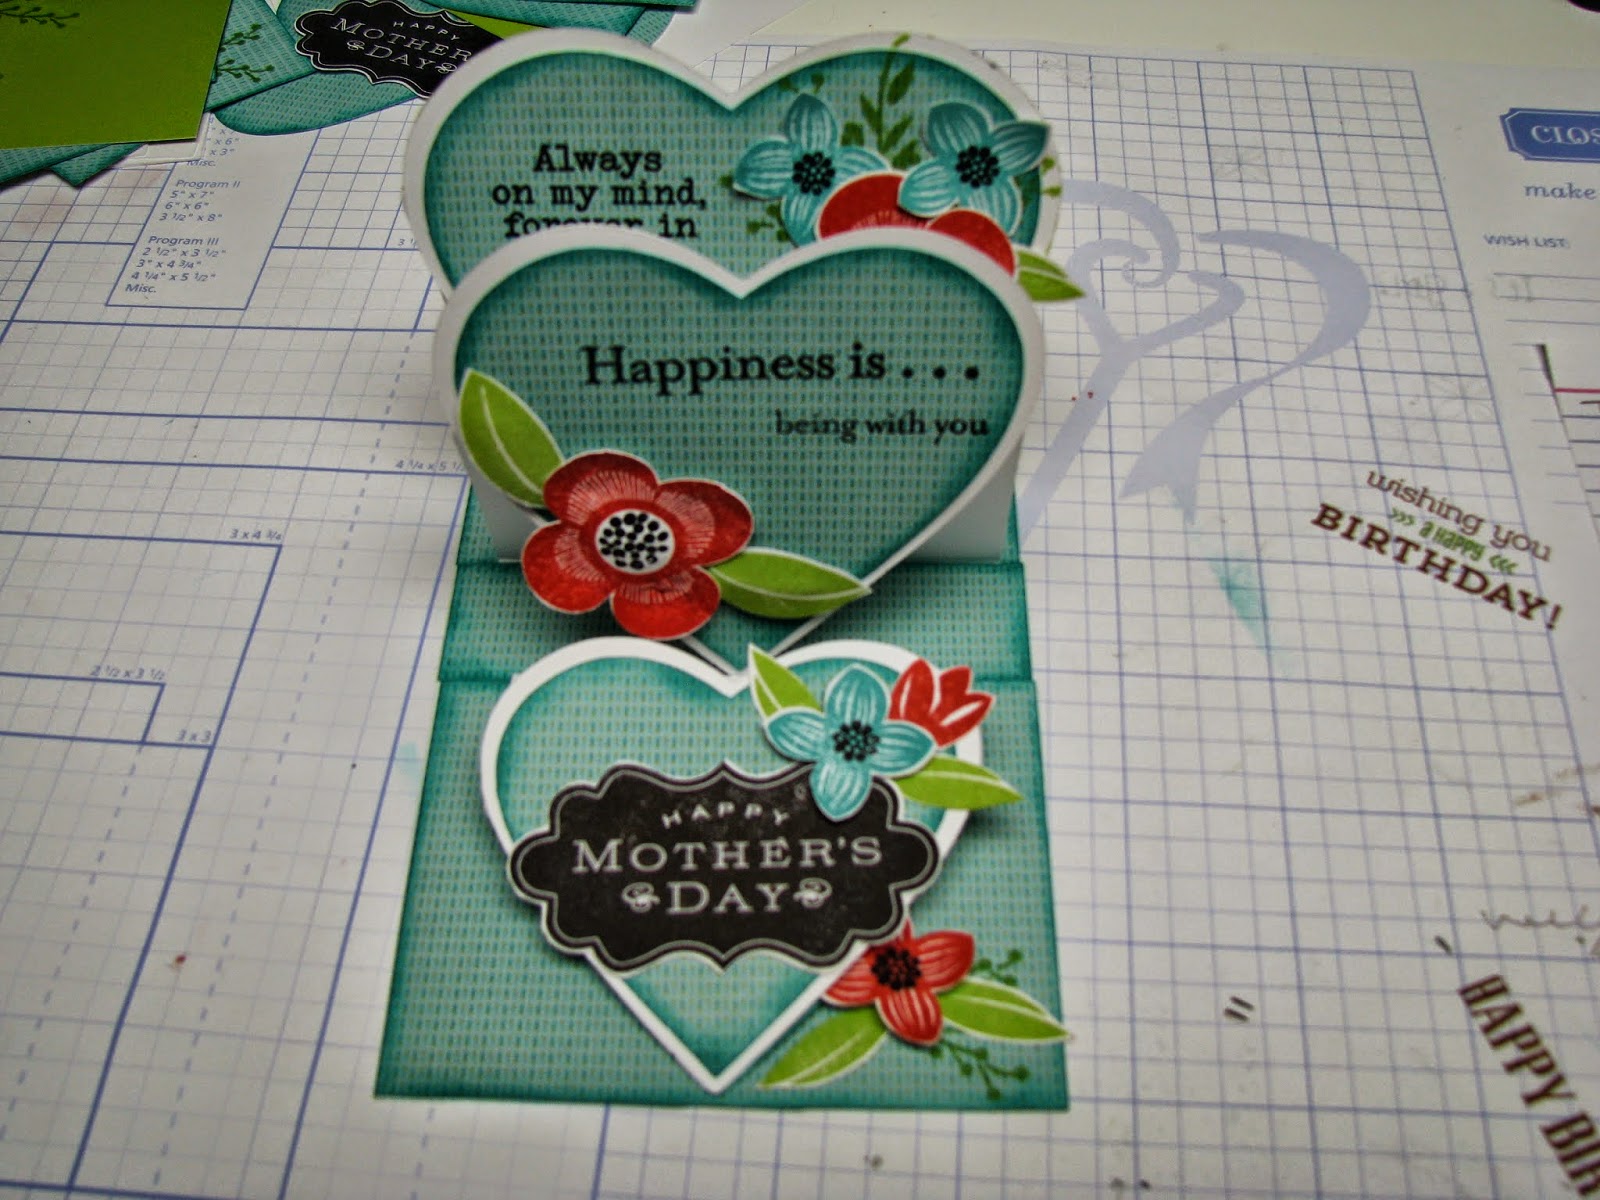
The second heart .

The third and last heart ~ revealing all the layers.

Side view.

Back view.

Using White Daisy card stock, cut a strip 4"x11". Score at 2 3/4", 5 1/2", turn and mark center at 2" as seen here and marked in red with "A". Using the CTMH Artiste cartridge page 51, Cut a 4" heart.

Using White Daisy card stock, cut a strip 3 1/2"x 8". Score at 2 ", 4", turn and mark center at 1 3/4" as seen here and marked in red with "B". Using the CTMH Artiste cartridge page 51,
Cut a 3 1/2" heart.

Using White Daisy card stock, cut a strip 3"x 6". Score at 1 1/2", 3", turn and mark center at 1 1/2" as seen here and marked in red with "C". Using the CTMH Artiste cartridge page 51, Cut a 3" heart.

The first step is to attach hearts to their respective cards. When attaching the hearts, match the tip of the heart with the half point marker on the card part that is scored and will later be folded to create the stand up mechanism. When gluing, it is best to put the glue on the card rather than the heart, this will avoid putting glue on the area that stands up above the card .

Once the hearts are attached, cut away the extra cardstock from the heart tip, as seen here.

This is a view from behind. As you can see the heart rises above the card fold, this is the part of the heart that we wanted to be careful NOT to add glue to earlier.

Repeat this procedure with all three hearts and card bases as seen here.

Using the pencil marks that show us the half way point on our cards, line up and glue down the two smaller pieces.

I put glue on the card backs to avoid placing glue where it shouldn't be.

Next using the Blossom B&T from CTMH, I cut strips 4" x 3", 4" x 1" and 4" x1 1/2". The paper does have a pattern on it, so I first cut a 4" strip and then cut the other dimensions from that strip, so the pattern would remain the same on all three pieces. I inked the strips with Lagoon Z2195 and a sponge Dauber. I also stamped the leaf sprig (from C1612) Shower flowers, with Pear Z2197 onto the bottom right corner of the larges piece, as shown above.

I then glued the strips in place.


Gluing the strips in this fashion, hides how the card was made and makes the card more visually appealing.

I cut a piece of Pear cardstock 4" x 3 1/2" and glued on the 4" striped strip from the B&T papers top. I stamped the leaf sprigs from the "Shower Flower" set in Pear in the desired location. I also stamped "MOM" from C1543 "Perfect Fit Mom" (retired stamp set) onto the colored stripe, using Archival Black 44751. I find the Archival ink gives the best results when stamping sentiments. I inked the edges with Pear and a sponge dauber.

I loosely glued it in place for size. It can be trimmed to fit at this point if necessary, then re-inked with Pear.

Using Glacier extra thick twine Z3039, I cut two pieces; 4 1/2" and 1 1/2". I made a knot with the smaller piece as seen above and then inserted the longer piece into the hole.

Then tightened the knot. This gives the impression of a tied knot, but uses less product.

I then taped the twine in place on the back of the card and secure it with adhesive.

It looks like this when it is attached, and the knot can be moved for perfect placement.

The final heart cut at 2" with the Cricut and the Artiste Cartridge, page 51, is then stamped with Whisper Ink Z2172, using the C1613 Paper Bird Hostess stamp set (heart). I then used D1645 Finding the words and Lagoon Ink Z2195 to stamp the "Love You" and again inked the edges with Lagoon and a sponge dauber.

Next using a stylus (sadly not available through CTMH) and a thick mat, I applied gentle pressure in a circular motion to the back of the heart. This causes the heart to curl and be raised in the middle. Be careful not to apply too much pressure, or the paper may tear. I then placed a dimensional foam adhesive in the center of the heart and used this to secure it in place on the card front as shown.

This photo shows the flowers, leaves and sentiments as stamped. The sentiments used came from the following stamp sets: C1604 Forever in My Heart "Always on my mind...", S1303 Floral Happiness (Retired SOTM) "Happiness is...". C1543 Perfect Fit Mom (Retired set) "Happy Mother's Day" ~ these were all stamped using Archival Black Ink 44751. The flowers and leaves are from C1612 Shower Flowers and were stamped in Smoothie Z2196, Lagoon Z2195 and leaves were stamped in Pear Z2197.

Flowers and leaves were fussy cut. I created dimension again using a stylus and a foam mat as previously shown. This does not have to be done, but I like the added 3 dimensional look.

The hearts were then glued to the center of the hearts on the cards base as shown.


Here are the completed cards shown from various angles.

Front and back of the card in an open position.

The front of the card open and closed.
Don't forget to sign and date your created master piece, like all good artists do!
I hope you found this tutorial helpful. If you require further clarification, please leave a comment below or email me at sandyzim@sasktel.net.
If you would like to purchase CTMH products for these or any other project, please go to my online website at sandyzim.ctmh.com and place your orders.
Just a gorgeous card!
ReplyDeleteThank You Kathy!
ReplyDeleteGorgeous card which I am planning to make.Thanks for the instructions. However, just wondering what size you cut the hearts on the Cricut in your B&T paper? Were they 3 3/4", 3 1/4" and 2 3/4"?
ReplyDeleteYes Karina those are the correct sizes. I'm sorry I forgot to include those in the tutorial. Would love to see your version.
ReplyDeletenice cards ...
ReplyDelete